Wavelet - and better sounding speakers (and headphones) on Android...
You may well be fairly happy with the audio output (speakers and headphones) on your existing Android phone. Or, like me, you may welcome an extra step up. Perhaps more bass/punch, clearer treble, or perhaps just a volume boost overall.
Now, there have been various 'boost' utilities for Android in the past and they've been a bit patchy in how well they work. But Wavelet, discovered by Ted Salmon back in 2021, is a whole different kettle of fish, in that it works supremely well, with extra bass, clarity, and volume, BUT has a very confusing interface.
Which is why a brief tutorial is in order. The steps come from Ted in bullet point form, but expanded by me here and with screenshots, which will hopefully help.
By the way, ignore the 'headphone specific' text in the app's title - it works perfectly well for speakers too. In fact, by definition, I'd say that it's really ONLY for speakers, since with headphones you've usually got plenty of natural isolation anyway and can hear the original audio better?
1. Install it. You can grab Wavelet here. There's now (2023) a prompt to spend a fiver on an even more advanced version but you can leave this alone for now (tap 'Later'). I'll amend this tutorial soon to reference the new features:
2. Start music playing in your chosen music player app. Although Wavelet also works with video streamers/players, having audio playing in the background will help you fine tune Wavelet, since you can apply settings and changes in real time.
3. Start Wavelet.
4. Tap on the big green button at the bottom to turn it on. If you start playing music then there's a good chance that, after a second or so, your phone speakers will sound a little better.
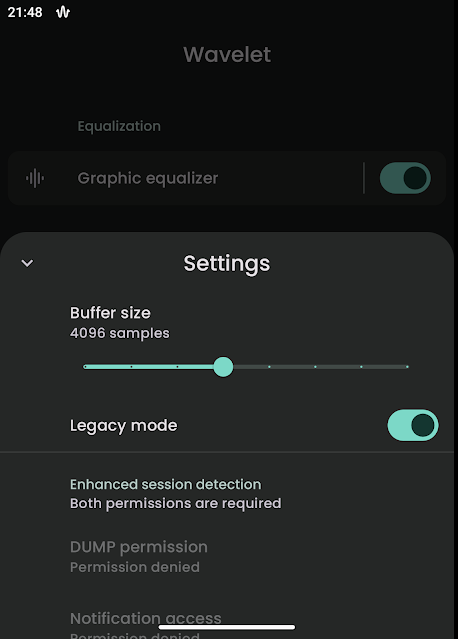
5. If they don't, then it's worth heading into Settings and throwing the switch for 'Legacy Mode'. You see, only a limited list of media apps work with the latest APIs whereas in Legacy mode almost any Android app that produces audio can be intercepted and improved.
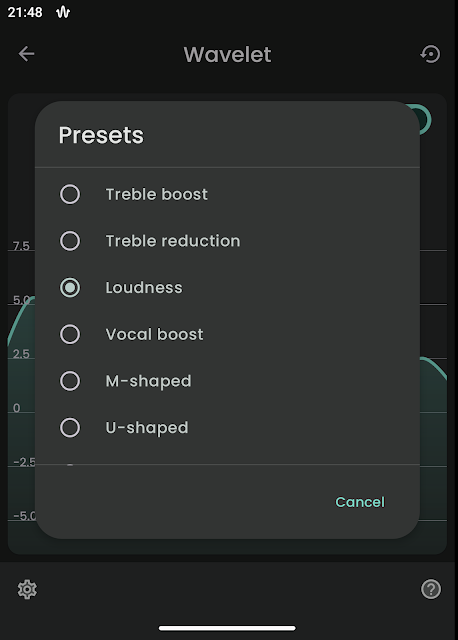
6. Turning on the Graphic Equaliser can improve things even more, but configuring this isn't obvious. First, tap on the words 'Graphic equaliser' to bring up the frequency graph.
7. Tap on 'Presets' to select your desired preset (e.g. 'Loudness') or scroll to the bottom of the list, where you'll see 'Personal'.
8. With 'Personal, tap once in the middle of the graph to reveal your 'personal' frequency sliders, simply adjust them to suit and tap 'OK'.
9. Further improvements may (they did for me) be made by enabling and tapping on 'Limiter'. This, among some advanced tweaks, gives access to 'post-gain', giving audio another potential kick to the ears.
As we have mentioned several times on the PSC podcast, when you turn Wavelet on/off there can be a short wait of a second or so while it kicks in for being system-wide, but once started all changes and all audio modifications are instant. Impressive!
PS. If you like this feature and want to support my work then please do so here via PayPal. Thanks.


Comments